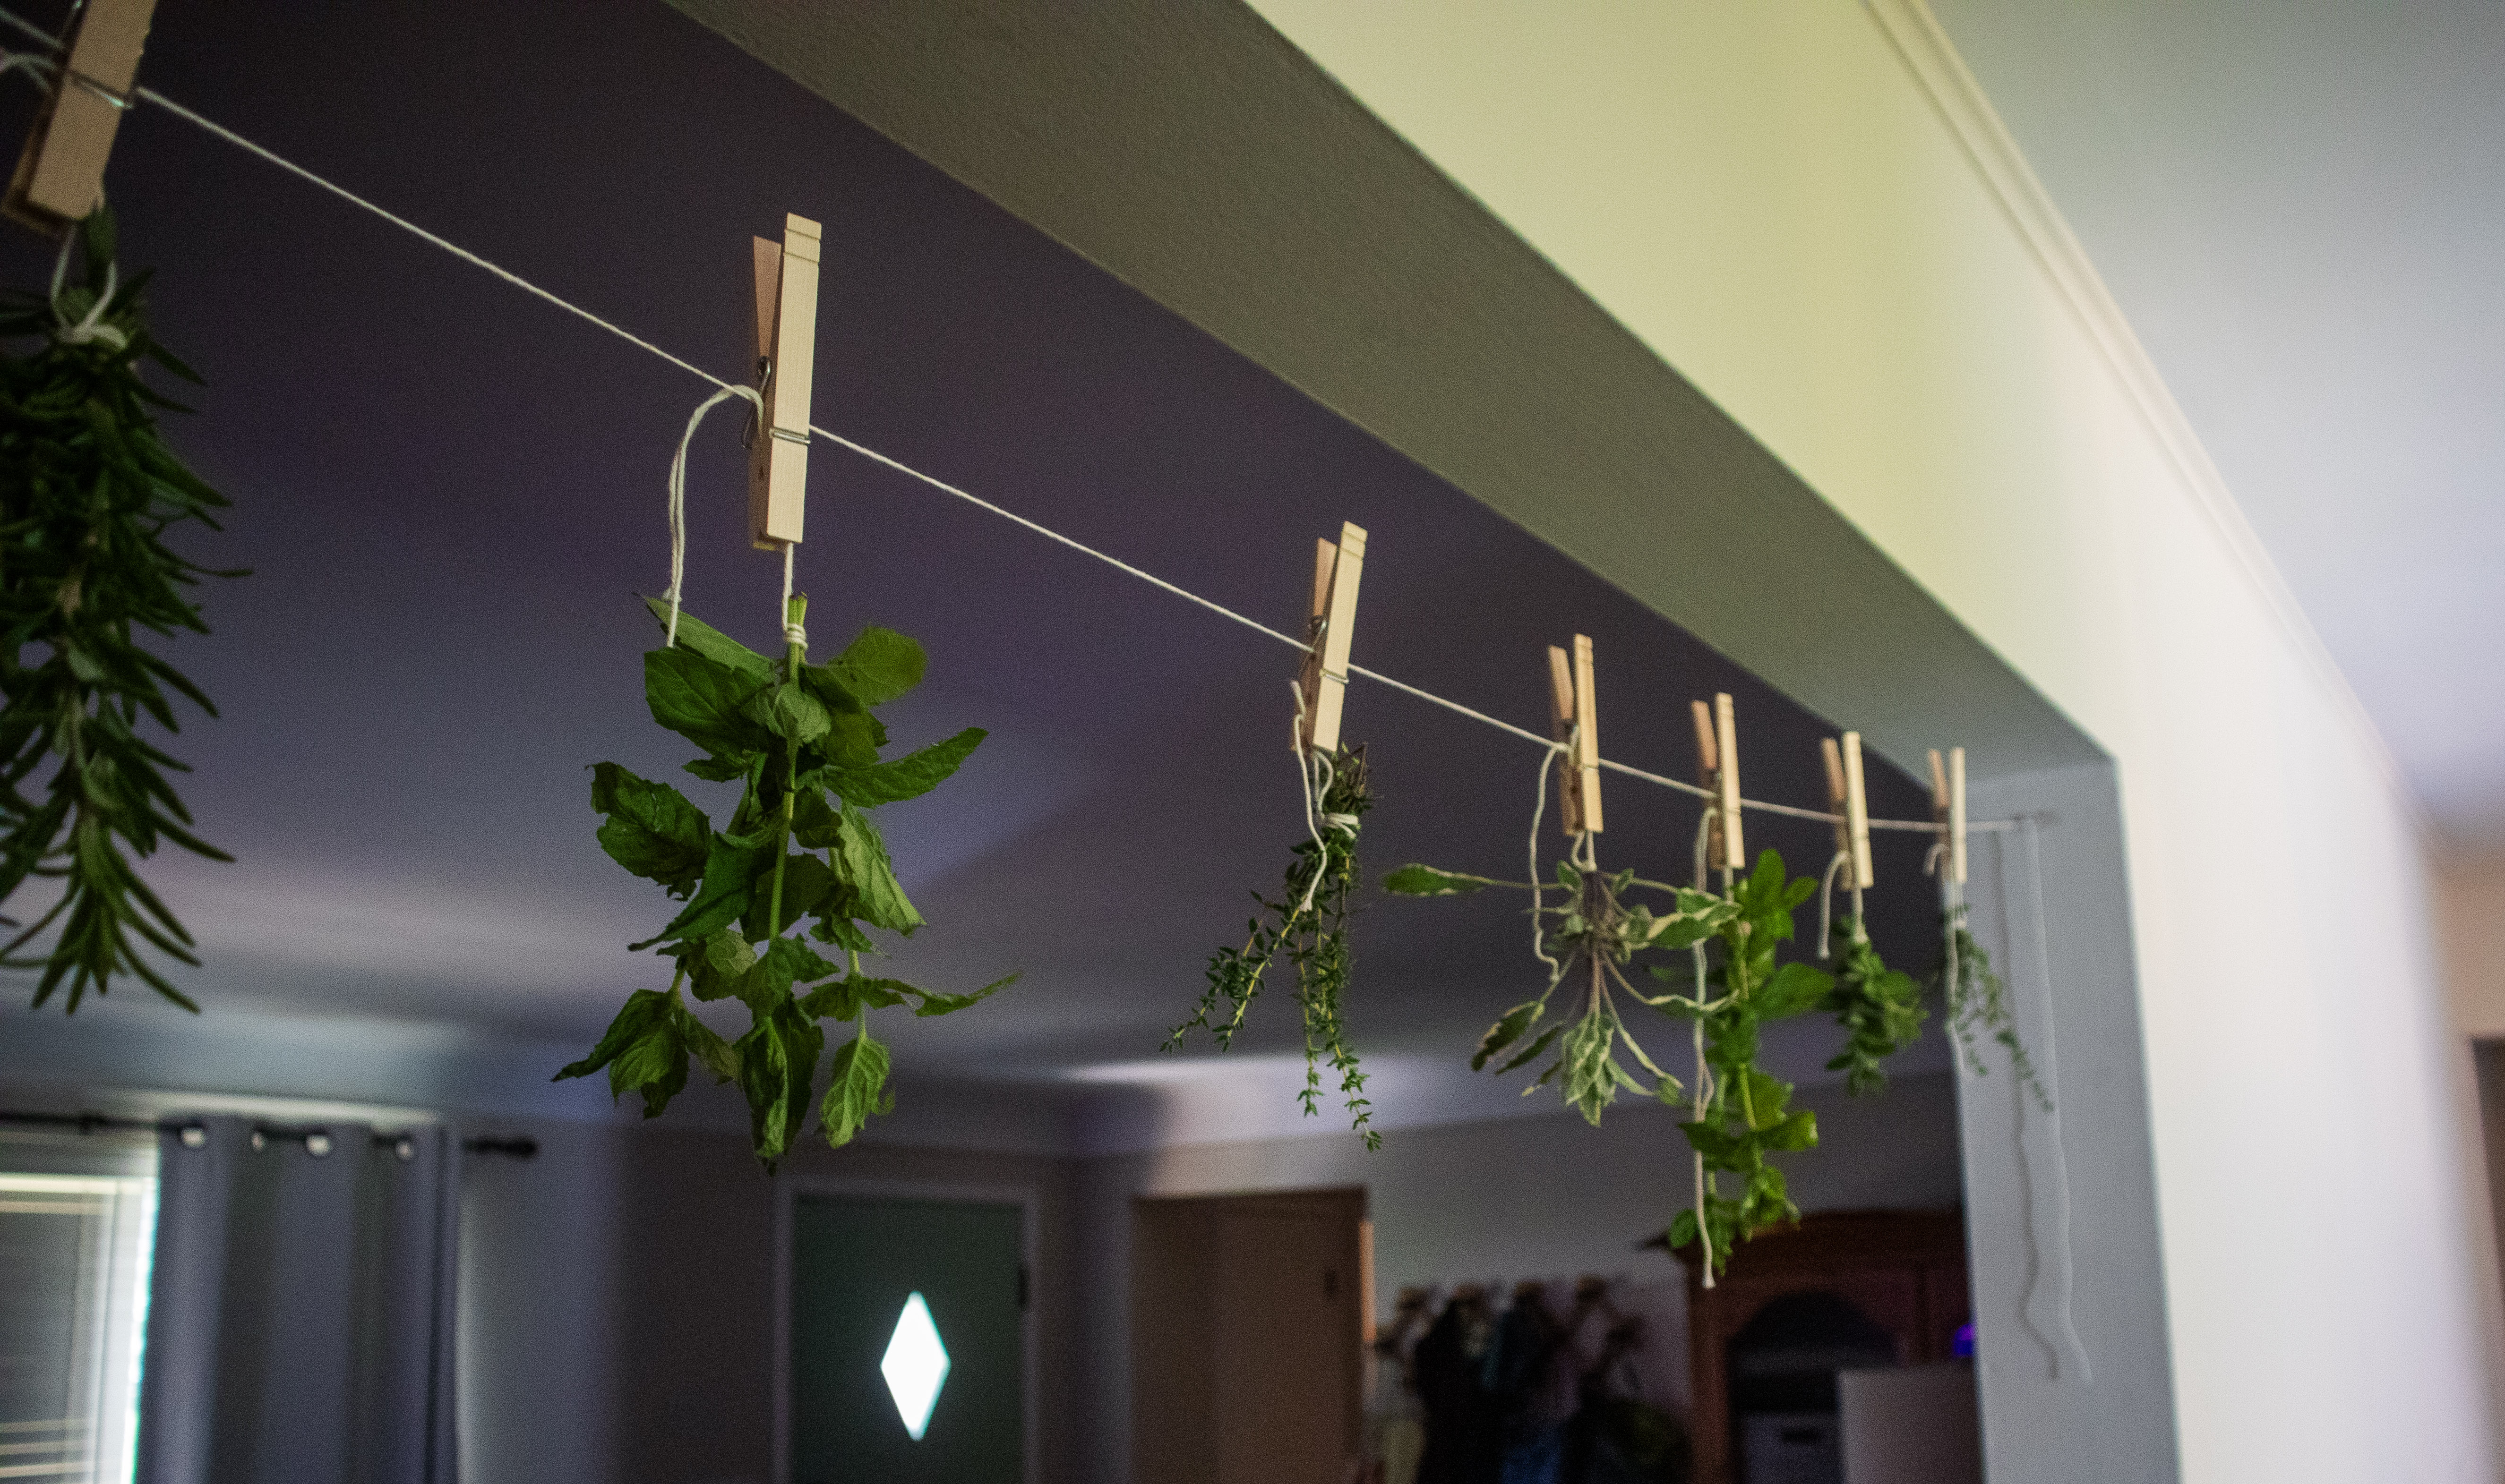

Herbs are one of those little garden additions that can do so much more than take up a corner of a raised bed.
They can help with companion planting, add incredible flavor to meals, and—if you preserve them—stick around long after the growing season is over.
This year, I decided to try my hand at drying herbs.
And I have to say, I was pleasantly surprised by how much I enjoyed it.
There was something about the whole process that felt almost magical. Harvesting herbs from the garden, tying them into little bundles, hanging them around my kitchen, and eventually crushing the dried leaves between my hands while seasoning potatoes.
I felt like a good old-fashioned hedge witch.
Why I Chose Air Drying
There are several ways to preserve what you grow, including canning, freezing, fermentation, pickling, and drying or dehydrating.
For herbs, you can use a dehydrator, oven, microwave, or simply let them air dry.
After doing some research, I decided that air drying was the best fit for me.
My three very scientific reasons?
- It’s inexpensive.
- It feels natural.
- It’s wonderfully whimsical.
I didn’t need to buy any special equipment, and there was something really satisfying about taking herbs from my garden and simply hanging them up to dry.
Sometimes the simplest method is the most enjoyable.
How to Air Dry Herbs
The process is surprisingly simple.
1. Harvest Your Herbs
Ideally, harvest herbs in the morning after the dew has dried but before the heat of the day really sets in.
For the strongest flavor, many herbs are best harvested just before they begin flowering.
Choose healthy stems and remove any damaged leaves.
If your herbs are dirty, give them a gentle rinse with cool water. Then pat them dry with paper towels and let them air dry completely before bundling them.
Moisture is the enemy here. Herbs that are wet when you bundle them are much more likely to develop mold.

2. Make Small Bundles
This is where things start looking adorable.
Gather about 5–6 stems together and secure them with twine or a rubber band.
Don’t be tempted to make huge bundles. The herbs in the middle need airflow too, and a thick bundle can stay damp long after the outside has dried.
I used the same cotton twine that I used for my tomato Florida Weave, because apparently one spool of twine is all you need to become a homesteader.

3. Find a Good Place to Hang Them
You want somewhere that is:
- Dry
- Out of direct sunlight
- Well ventilated
- Away from excessive humidity
Good airflow is especially important because herbs need moisture to escape as they dry.
I didn’t have a perfect herb-drying setup in my house, so I improvised.
I used two Command hooks and tied a string across the opening between my living room and kitchen and hung my herb bundles there.
Was it fancy?
No.
Did it work?
Absolutely.
And did it make my kitchen look like a tiny cottage witch’s kitchen?
Also absolutely.
Sometimes micro-homesteading is just making do with what you have.

How Long Does It Take?
Air drying can take anywhere from about 1–4 weeks, depending on the type of herb, humidity, airflow, and size of your bundles.
Don’t rely entirely on the calendar, though. Let the herbs tell you when they’re ready.
The leaves should feel brittle and crisp and crumble easily between your fingers. Woody stems should snap cleanly when bent.
If they’re still soft or bendy, give them more time.
Once they’re completely dry, gently strip the leaves from the stems and discard the stems if you’re not planning to use them.
Storing Your Dried Herbs
Store your dried herbs in a clean, airtight container, preferably glass.
Keep them somewhere cool and dark, like a pantry or cupboard.
And label them!
Future-you will appreciate knowing whether that little green jar contains oregano, thyme, or something else entirely.
For the best flavor, try to use your dried herbs within about a year.
Tip: if you are worried about your herbs being dry enough, you can use desiccant packets. I ordered some food safe ones on amazon to use with my seeds that I might throw in with some of my herbs.
What Herbs Can I Air Dry?
Some herbs are particularly well suited to air drying because they have lower moisture content.
Great options include:
- Rosemary
- Thyme
- Sage
- Oregano
- Mint
- Lemon balm
- Chamomile
Tender herbs can be dried too, but they contain more moisture and may need smaller bundles or faster drying to reduce the risk of mold.
And don’t feel like you have to grow everything yourself.
I actually had some fresh herbs from the grocery store that I wasn’t going to use before they went bad, so I dried those too.
You don’t have to grow everything in your backyard to benefit from food preservation.
Sometimes micro-homesteading is simply finding a way to waste a little less.
Okay, I Dried Them. Now What?
Now comes the fun part.
Actually using them.
Dried herbs are more concentrated than fresh herbs, so you’ll generally need less.
A good starting guideline is:
1 tablespoon fresh herbs = about 1 teaspoon dried herbs.
That’s roughly a 3:1 ratio, but don’t treat it like a hard-and-fast rule. Different herbs and recipes can vary, so taste as you go and adjust to your liking.
Wake Up Your Herbs
One of my favorite little tricks is to gently rub dried herbs between your palms before adding them to a dish.
The friction helps release some of the aromatic oils and wakes up the flavor.
It also makes you feel like you’re preparing a potion, which is an added bonus.
Add Them Early
Dried herbs generally benefit from being added earlier in the cooking process. They have time to rehydrate and infuse the rest of the dish with flavor.
Think:
- Soups
- Stews
- Pasta sauces
- Roasted vegetables
- Slow-cooked dishes
The exact timing depends on the herb and the recipe, so don’t be afraid to experiment.

My Favorite Part
The first time I used my dried herbs, I sprinkled them over roasted potatoes.
Nothing fancy.
Just potatoes, oil, salt, and herbs I’d grown and dried myself.
As I rubbed the little leaves between my hands and sprinkled them over the potatoes, I realized just how satisfying the whole process was.
I grew this.
I preserved this.
And now I’m eating it.
That’s one of the things I love about micro-homesteading.
The payoff isn’t always some enormous harvest or impressive pantry stocked from floor to ceiling.
Sometimes it’s something as simple as seasoning dinner with something you grew in your own backyard months earlier.
And that feels pretty darn special.
Turn Your Herbs Into Gifts
Once you’ve gone through the trouble of drying your own herbs, you can easily turn them into little homemade gifts.
Fill small glass jars with dried herbs or homemade seasoning blends, add a handwritten label, and tie a little piece of twine around the top.
You could make:
- Italian seasoning
- Herb salts
- Roasted vegetable blends
- Soup seasoning
- Tea blends
They’re inexpensive, useful, and feel much more personal than something picked up at the store.
I can already picture little jars of homemade herb blends tucked into Christmas gift baskets.
A Few Things I Learned
If you’re going to try air drying herbs yourself, here are the things I’d keep in mind:
Keep your bundles small. The herbs in the center need airflow too.
Make sure they’re dry before hanging. A little extra patience here can save you from a moldy mess later.
Avoid direct sunlight. A cool, dry, well-ventilated spot is best.
Don’t panic if you don’t have a perfect setup. My herbs were hanging from Command hooks between my kitchen and living room, and they turned out just fine.
And don’t forget the grocery store herbs! Drying herbs you already bought is an easy way to prevent food waste.
Frequently Asked Questions
How long does it take to air dry herbs indoors?
Usually around 2–4 weeks, although some herbs may dry faster depending on the humidity and airflow in your home.
How do I know when my herbs are completely dry?
The leaves should feel brittle and crisp and crumble easily between your fingers. Woody stems should snap cleanly when bent.
Can I dry herbs that have already flowered?
Yes! For the strongest culinary flavor, it’s generally best to harvest herbs before flowering, but flowering herbs can still be dried and used.
Why did my herbs turn brown or moldy?
Usually, this is caused by too much moisture, bundles that are too large, poor airflow, or direct sunlight. Try smaller bundles and a drier location with better airflow.
A Simple Little Project With a Big Payoff
I didn’t expect hanging a few bundles of herbs in my kitchen to make me this happy.
But there’s something really lovely about preserving a piece of your garden with your own two hands.
It’s simple.
It’s inexpensive.
It’s useful.
And, apparently, it makes me feel like a hedge witch.
I’ll take it.
If you’re looking for an easy beginner-friendly homesteading project, I’d absolutely recommend giving herb drying a try. You don’t need a dehydrator, a fancy setup, or a giant garden.
Just a few herbs, some twine, and a little patience.
And if you’ve dried your own herbs, I’d love to hear what worked for you! Share your favorite herb-drying tips in the comments below.
References
- Michigan State University Extension. “Science Behind Food Preservation Methods.”
Michigan State University Extension - University of Illinois Extension. “Food Preservation.”
University of Illinois Extension - National Center for Home Food Preservation. “Herbs.”
National Center for Home Food Preservation - Penn State Extension. “Let’s Preserve: Drying Herbs.”
Penn State Extension - Penn State Extension. “Preserving Herbs by Drying.”
Penn State Extension - Penn State Extension. “Enhance the Flavor of Food with Herbs.”
Penn State Extension




Leave a Reply