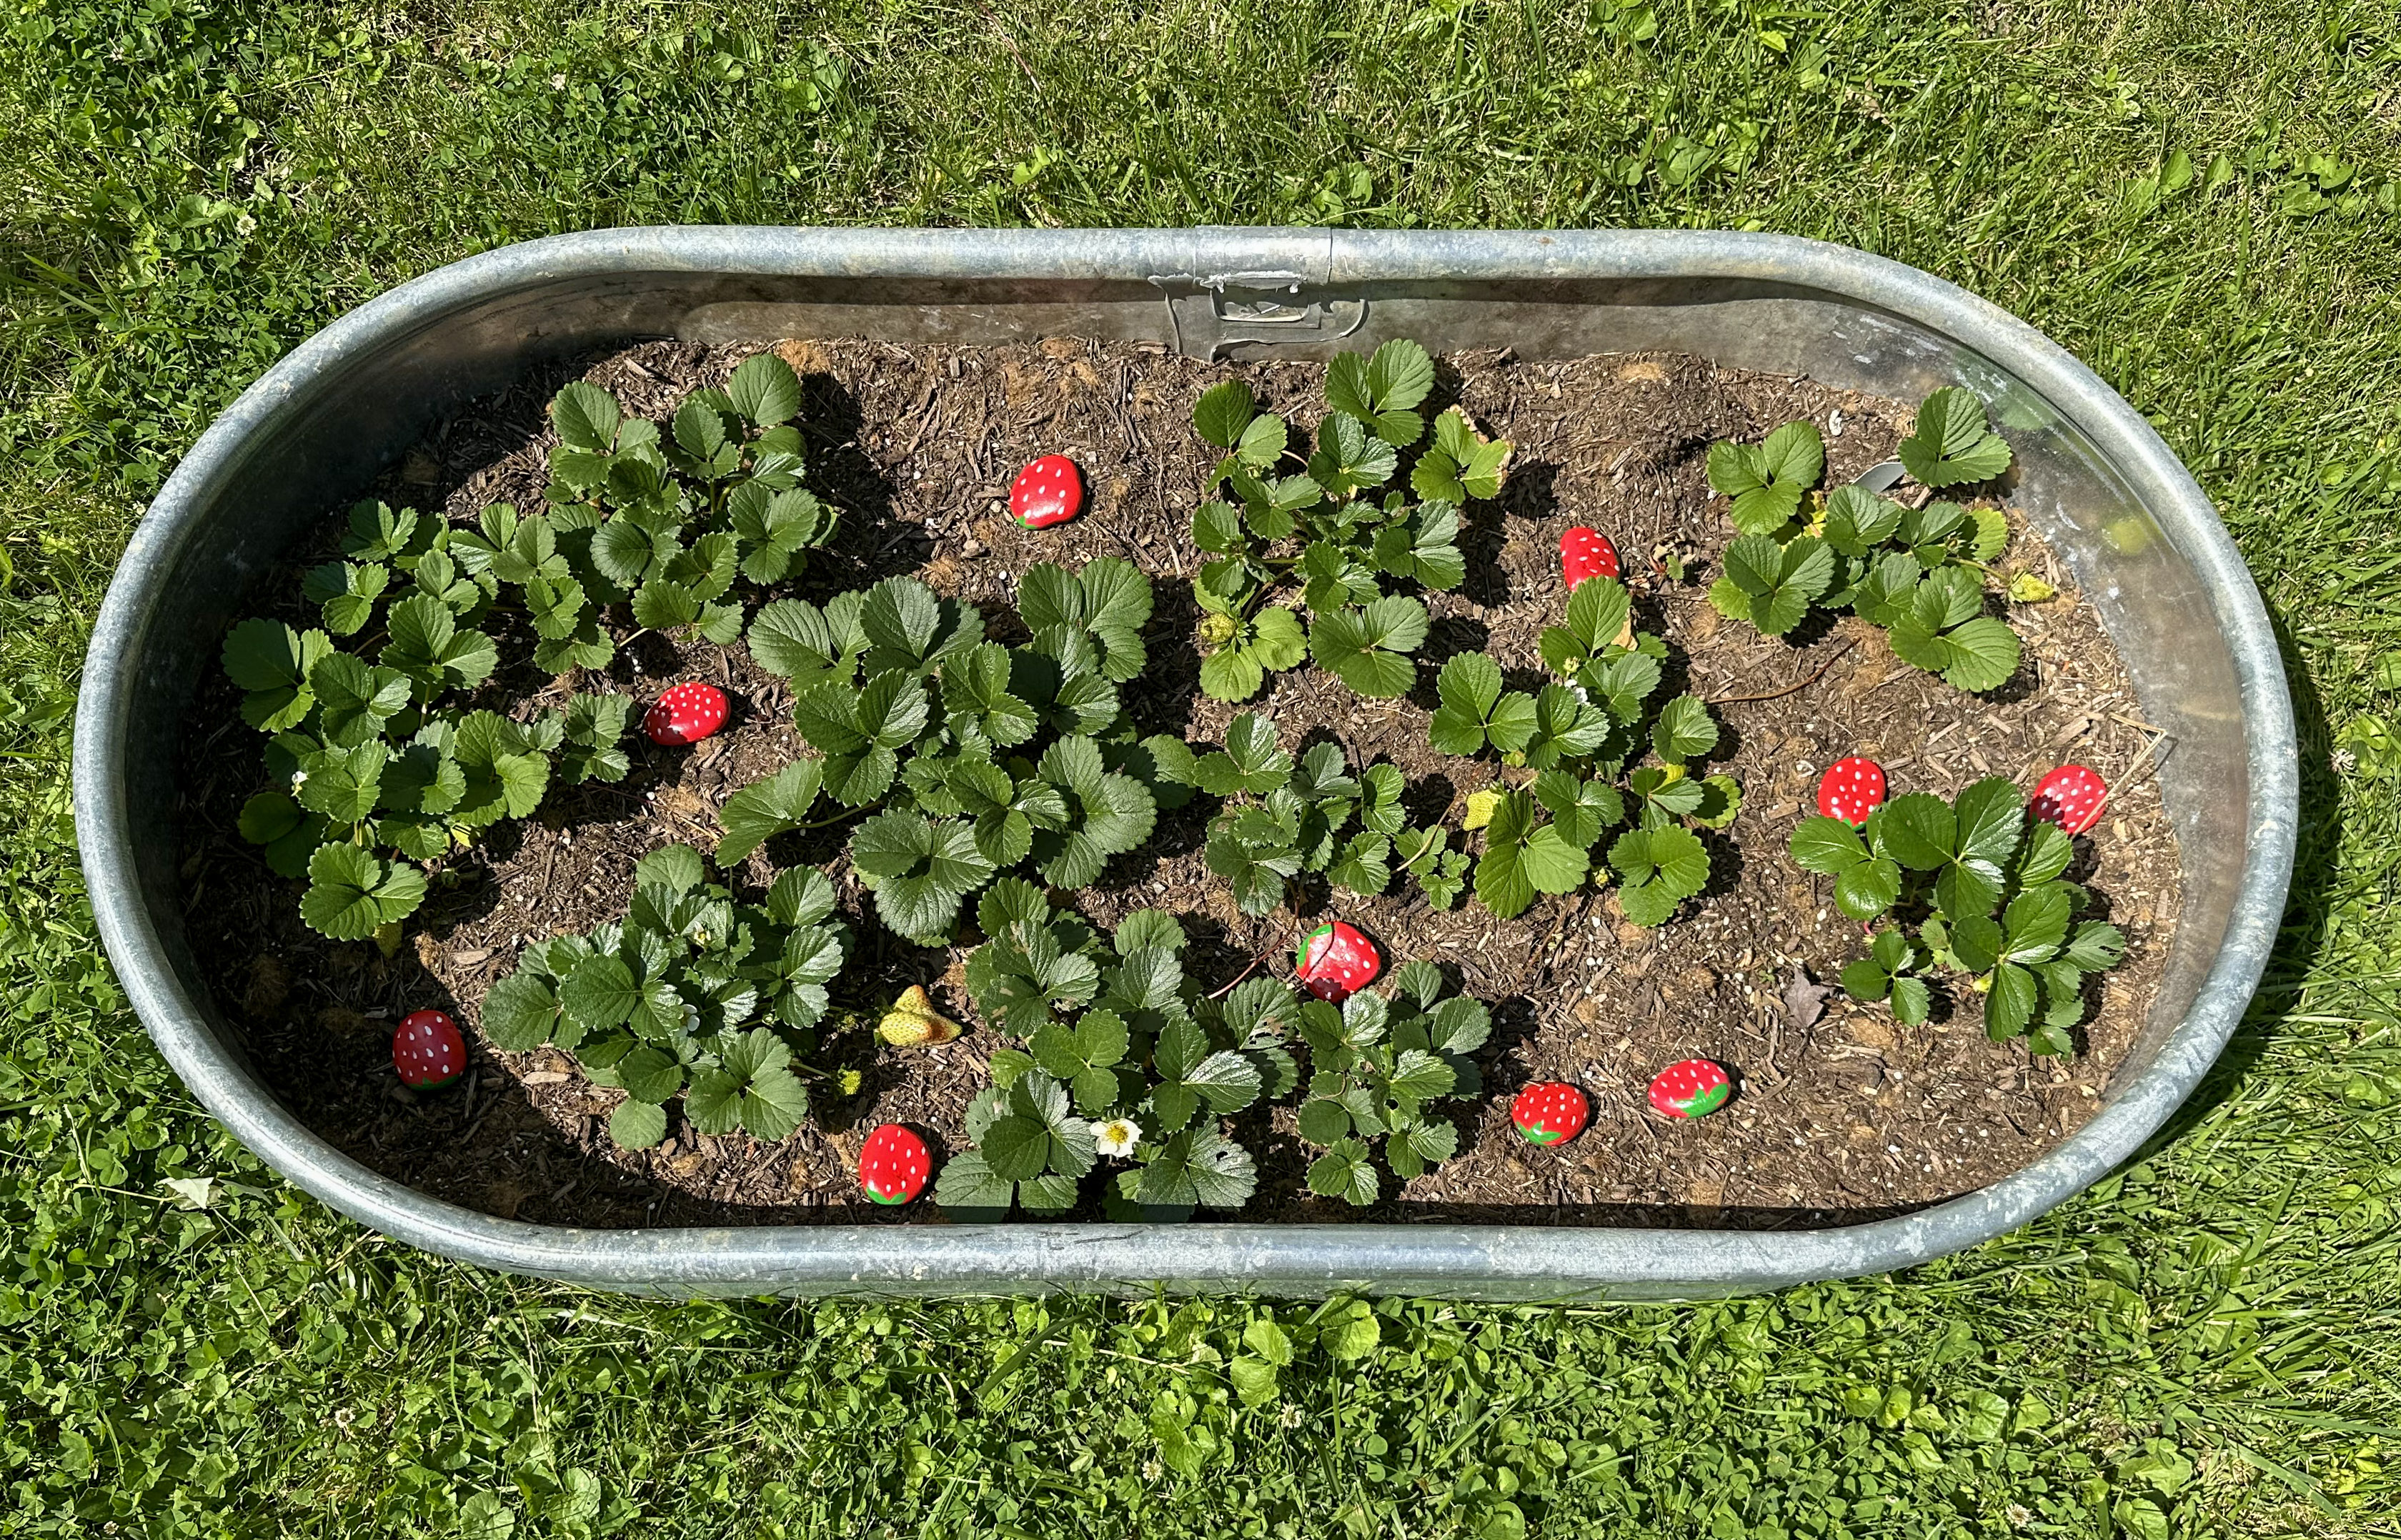
If you’re looking for a simple way to protect strawberries from birds, strawberry decoy rocks might be worth trying. These painted rocks are designed to show birds that bright red “strawberries” in your garden aren’t worth pecking. Whether they work through science or sheer confusion, they’re an inexpensive garden craft that adds another layer of protection to your berry harvest.
Why Make a Decoy Strawberry?
Last year, our neighborhood bunnies discovered our strawberries before we did.
By the time we went looking for ripe berries, most of them had already been sampled—or completely eaten. After sacrificing more strawberries than we care to admit, we moved the remaining plants higher off the ground and finally managed to harvest a few berries for ourselves.
Problem solved.
Or at least the bunny problem was.
Growing your own food has a funny way of making you notice just how many creatures are interested in the same things you are. It’s also a constant reminder that gardening is one big experiment. Every year I learn something new, from protecting the harvest to avoiding mistakes I made while starting plants from seed.
But just because the rabbits couldn’t reach the strawberries anymore didn’t mean the berries were suddenly safe.
So I started looking for ways to give the plants a little extra protection. That’s when I came across the idea of strawberry decoy rocks—a simple DIY method some gardeners use to help protect strawberries from birds. Somewhere online—I can’t remember where, or I’d happily give credit—I saw someone paint rocks to look like strawberries. The theory is that birds peck at the fake berries, discover they’re hard and decidedly not food, and eventually learn to leave the real strawberries alone.
Would it actually work?
I wasn’t entirely convinced.
But it checked two very important boxes:
- It might help protect my strawberries.
- It involved a craft project.
And honestly, a project that combines gardening and crafting doesn’t need much more of a sales pitch than that.
Materials
The best part about this project is that it uses things you probably already have lying around.
- Rocks (I used some leftover landscaping rocks from a project the previous homeowners had done. I’ve had a bucket of them sitting around for a couple of years, waiting for the perfect project.)
- Red, green, and white craft paint
- Polyurethane spray sealer
- A few paint brushes
- A cup of water for rinsing brushes
- Paper towels
- A paint palette (I used leftover plastic party plates, but cardboard works just as well)
The total cost was minimal since I already had most of the supplies. Projects that help me use up materials I’ve been saving “just in case” are my budget’s favorite kind.
How to Paint Strawberry Rocks

The first step was choosing rocks that were vaguely strawberry-shaped. Perfection wasn’t necessary. Once they’re painted and tucked among the plants, your brain does most of the work, filling in the details.
I painted the rocks red first. I ended up doing three or four coats to get solid coverage. The rocks absorbed more paint than I expected, but after a few coats, they started looking surprisingly berry-like.
Once the red paint dried, I painted little green stars on top of each rock to look like stems. That took about two coats as well. I rotated the stems a bit so the strawberries would have some personality.
At this point, they probably would have worked as strawberry decoys, but they looked more like tomatoes than strawberries.
And if I’m going to spend time making fake strawberries, I want them to be cute.
So I added small white teardrop-shaped dots to mimic strawberry seeds. One tip: try to keep all the teardrops pointing in the same direction. That’s how the seeds naturally appear on real strawberries, and it makes a surprising difference in how realistic they look.
This was my favorite part of the project because the rocks suddenly transformed from painted rocks into actual strawberries.
Well… strawberry-ish.
Close enough.
I worked on this project over several evenings while watching TV. It was one of those low-pressure projects that didn’t require much concentration. I could paint a few rocks, set them aside to dry, and come back the next day.
Honestly, that relaxed pace was part of what made the project so enjoyable.
Don’t Skip the Sealer
The final step was spraying everything with polyurethane.
This part is important because these rocks will live outside, exposed to rain, sun, and whatever other weather Ohio decides to throw at them.
Without a protective seal, the paint would eventually fade or wash away. More importantly, we work hard to build healthy garden soil with compost and organic matter. The last thing I want is paint flaking off into the beds over time.
A couple of light coats of polyurethane should help the rocks stay looking fresh for several seasons.
Placing the Decoys

Once everything was dry, I tucked the strawberry decoy rocks throughout the strawberry bed.
The goal is to place them before your real strawberries begin ripening. That way, birds encounter the fake berries first and hopefully learn that pecking at bright red strawberry-shaped objects isn’t worth the effort.
I’ll be honest, there were already a couple of white strawberries in the bed before I got around to finishing this project. But better late than never!
Plus, they look surprisingly cute scattered around the garden. Very cottage-core.
Did They Work?
So far, the raised bed has kept the bunnies away, and the strawberry rocks seem to be helping discourage other visitors from sampling the berries before we do.
Of course, gardening is never that simple. The ants have recently decided they deserve a share of the harvest too, so that’s the next challenge on the list.
While I can’t guarantee that strawberry decoy rocks will completely protect your berries from the wildlife, they are an inexpensive and easy DIY garden project that may help protect your strawberry patch. Combined with other methods like raised beds or additional barriers, they can be one more way to keep a few extra strawberries for the person who actually grew them.
This project was inexpensive, fun to make, and gave me another layer of protection for my strawberries. Even if it saves only a handful of berries each season, I’d call that a success.
And if nothing else, I now have a garden full of tiny painted strawberries, which makes me smile every time I walk past them.


Leave a Reply